
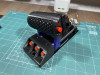
Minimalist WWII Slider Flight Throttle
21 June 2023 | Hits: 9065 | Downloads: 543 | Sim Gear | Free | Digital


-
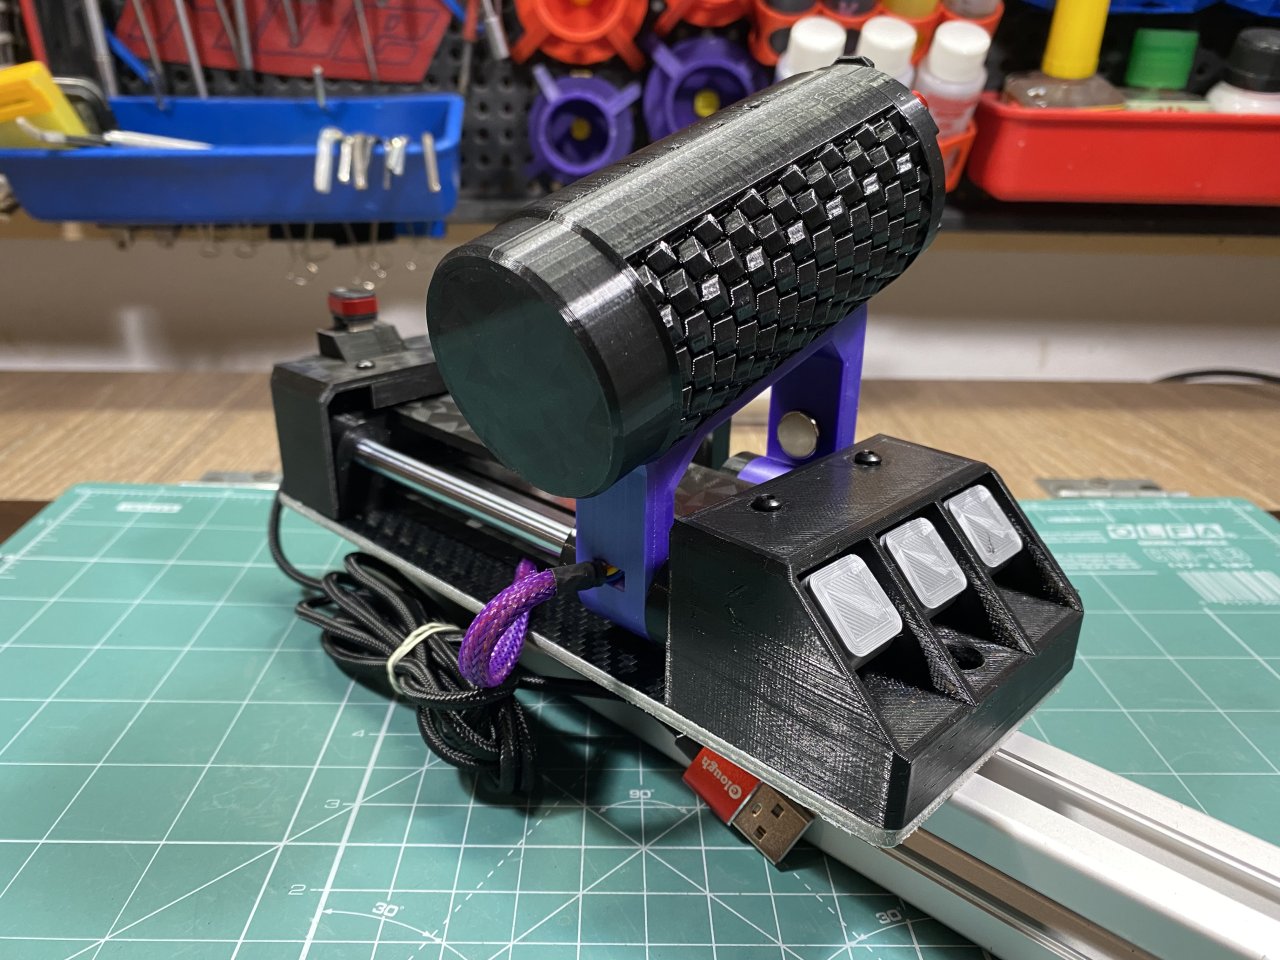
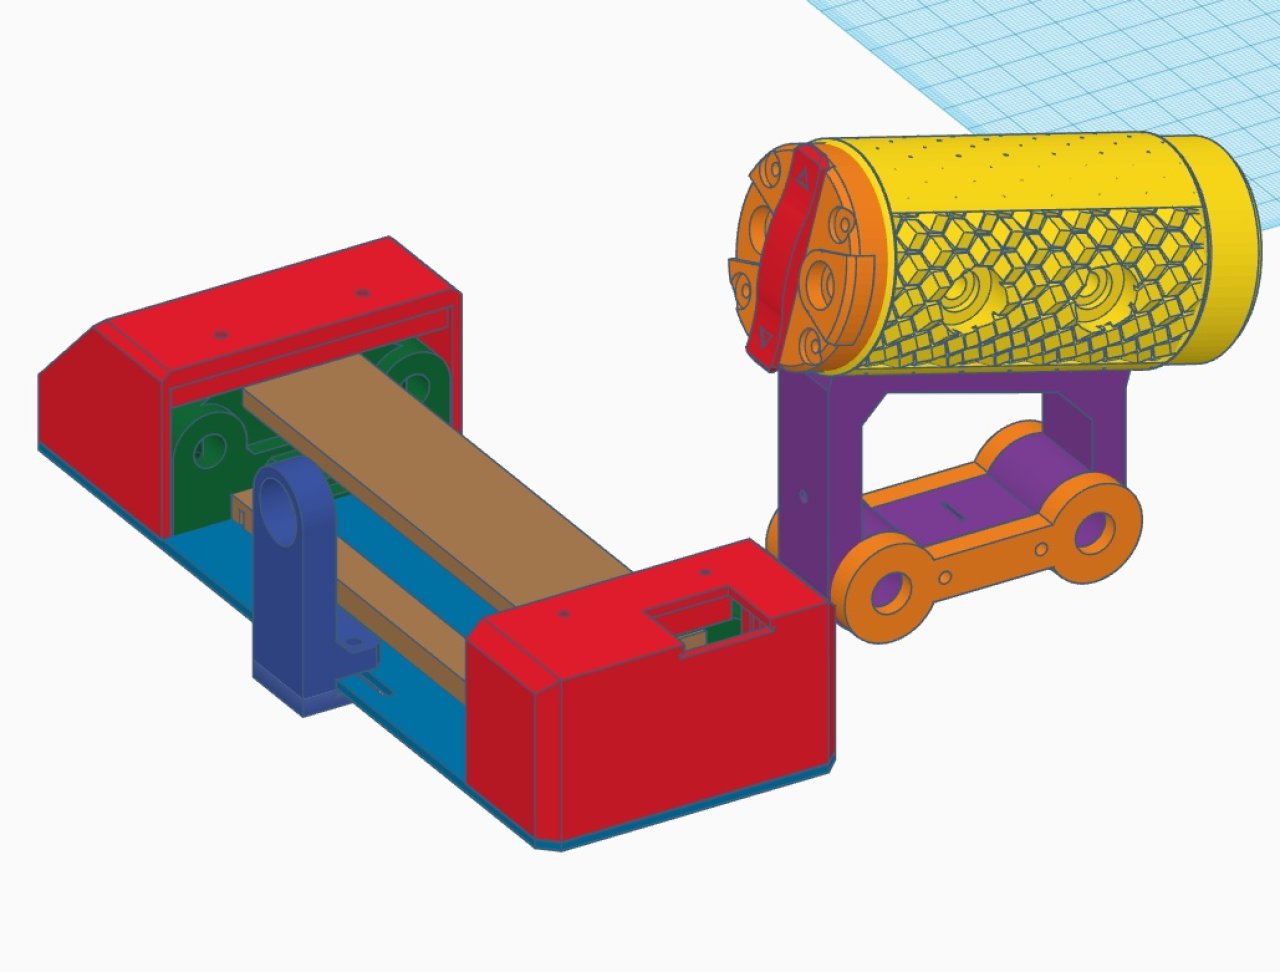
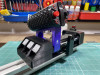
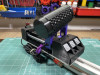
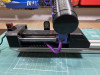
Minimalistic Slider Throttle inspired by WWII designs. I use it mainly for playing Star Wars squadrons and for this it works great. I do not need much more than the present buttons, also design goals was small footprint so I can easily attach it to my Sim Rig when in Flight mode.
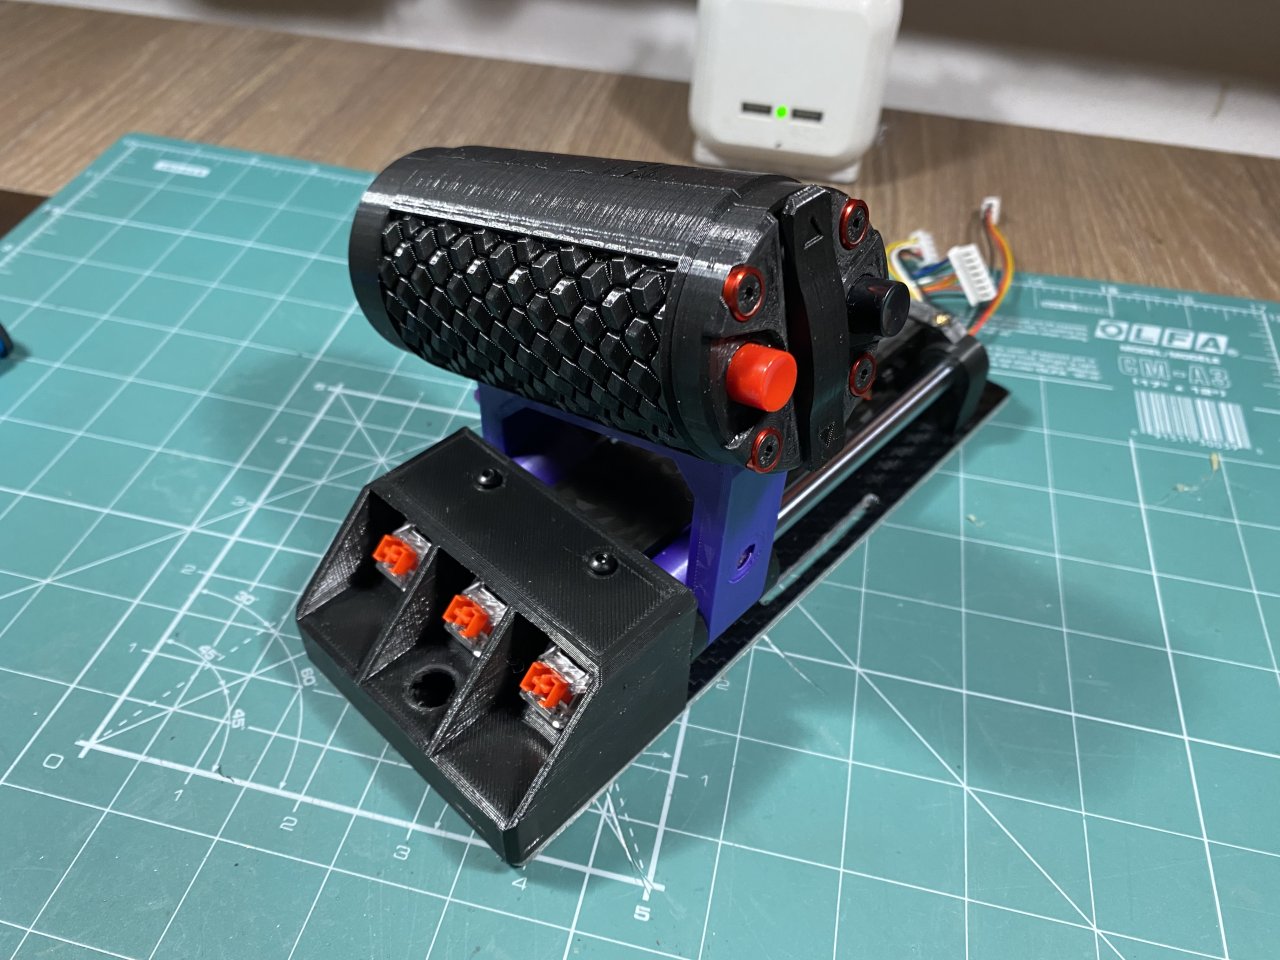
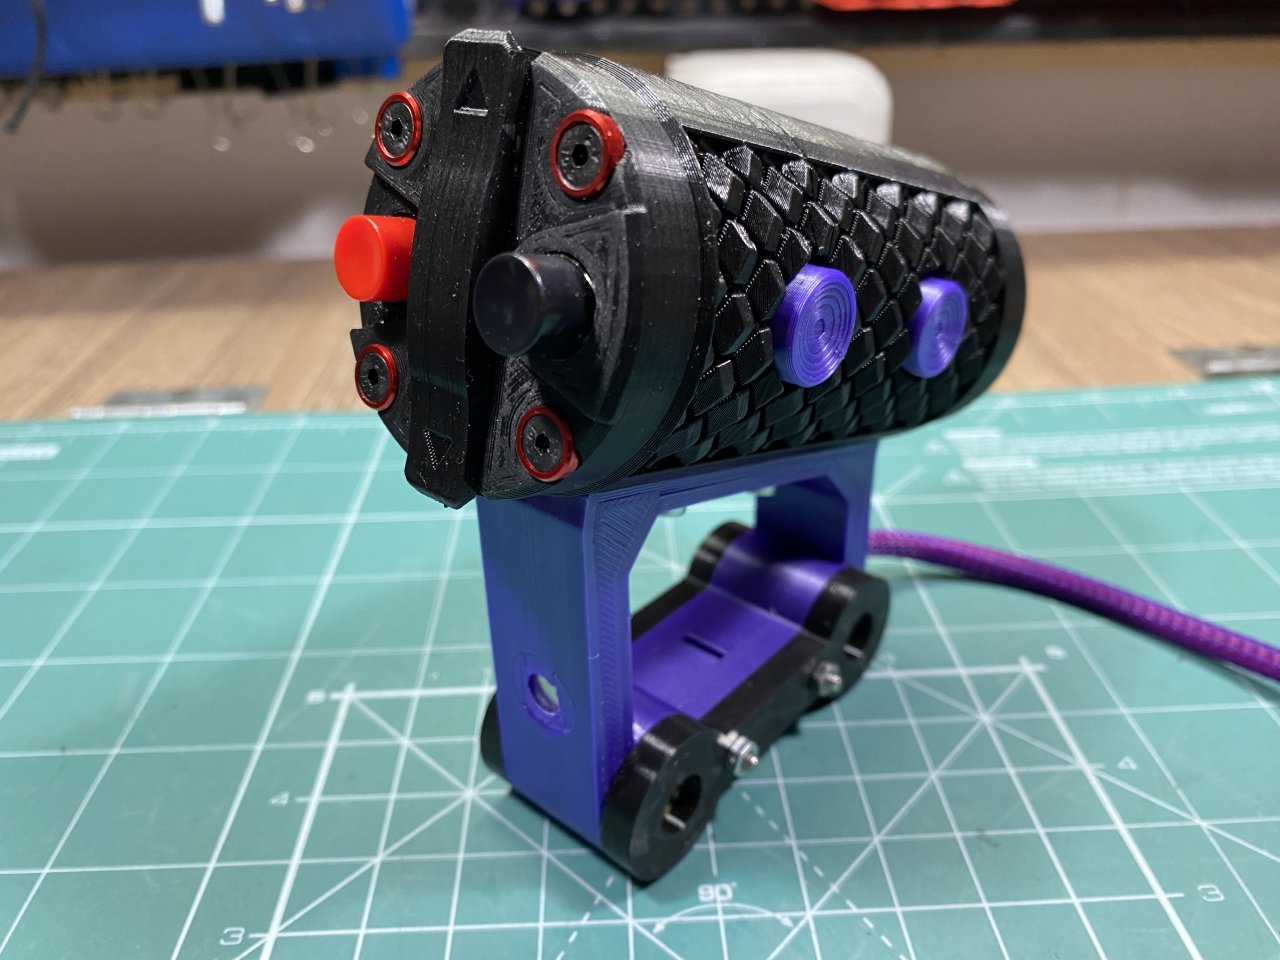
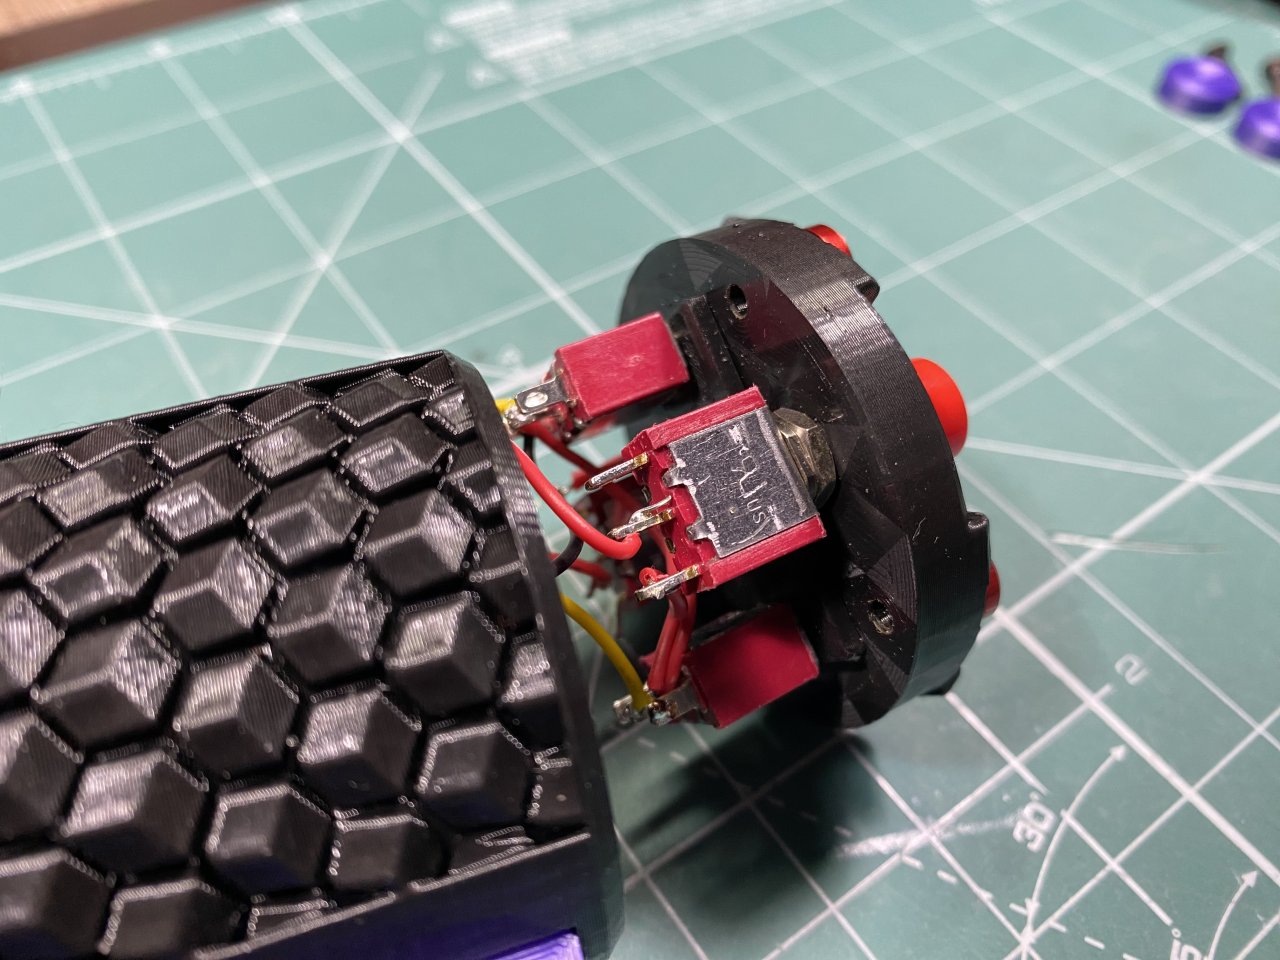
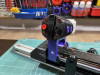
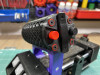
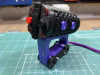
It has 6 buttons on the throttle grip, 3 buttons on base and magnetic adjustable detent, which works rather well. Effective travel of throttle is 100mm and I am very satisfied with the extended range (TCWS is about 80mm). It also has some elevated flat surface on top of front mounted buttons to act as a hand/wrist rest on longer transfers.
Backstory - when I decided to sell my Thrustmaster.T16000M HOTAS combo I was planning on buying Virpil combo, but on the other side I really liked the TCWS slider and was reluctant to switch to pivot throttle. Furthermore saving some money is always welcome, so I opted to making my own slider throttle and spending some more on a high end joystick. At the end this turned out quite successful project and based on the limited space games I play personally do not think I will switch to another throttle anytime soon. Plus it took some of its inspiration from a X-Wing throttle and is quite natural when playin SW Squadrons in VR.
-
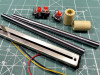
Parts:
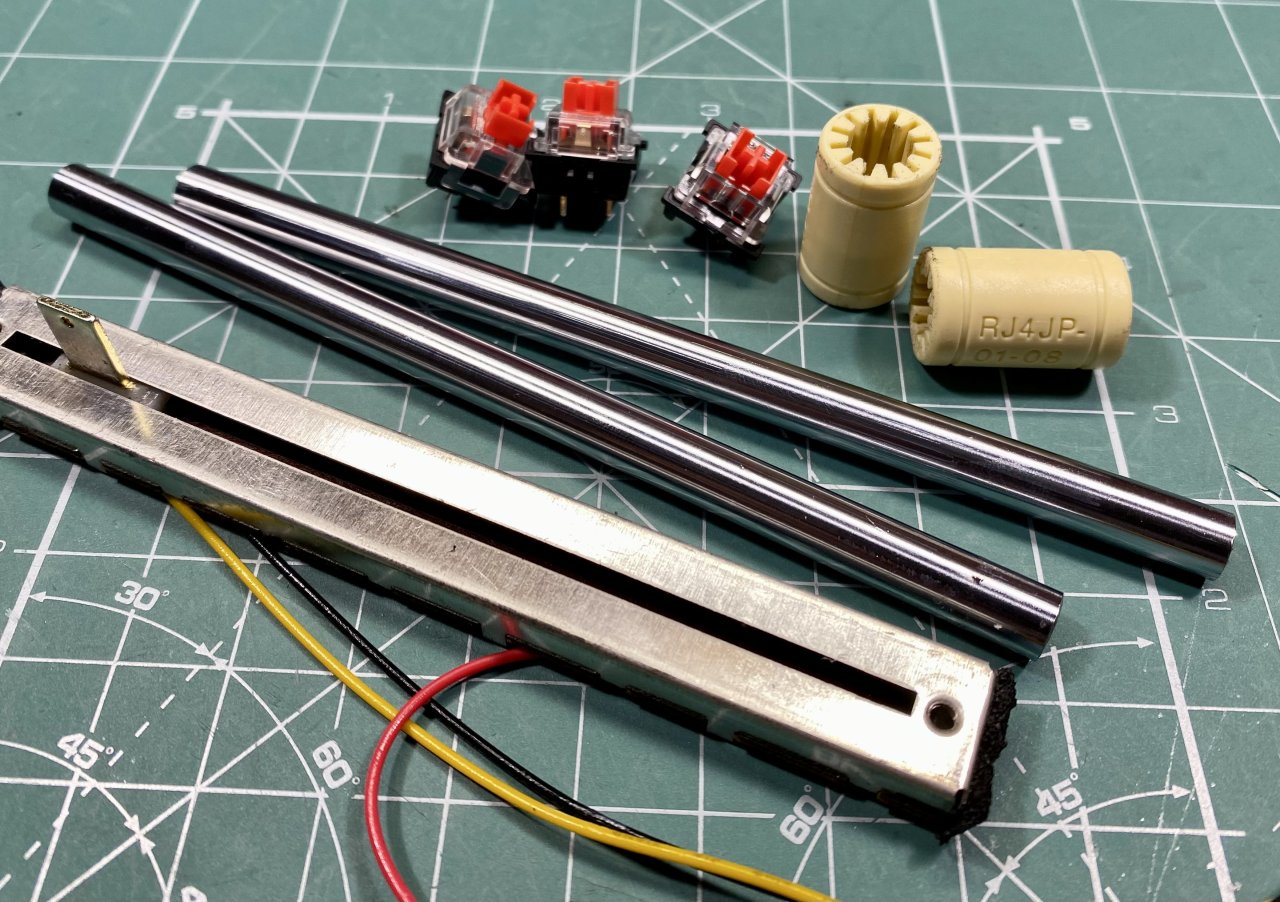
1. Slider Potentiometer 128mm (100mm travel): https://www.aliexpress.com/item/1005005672998771.html
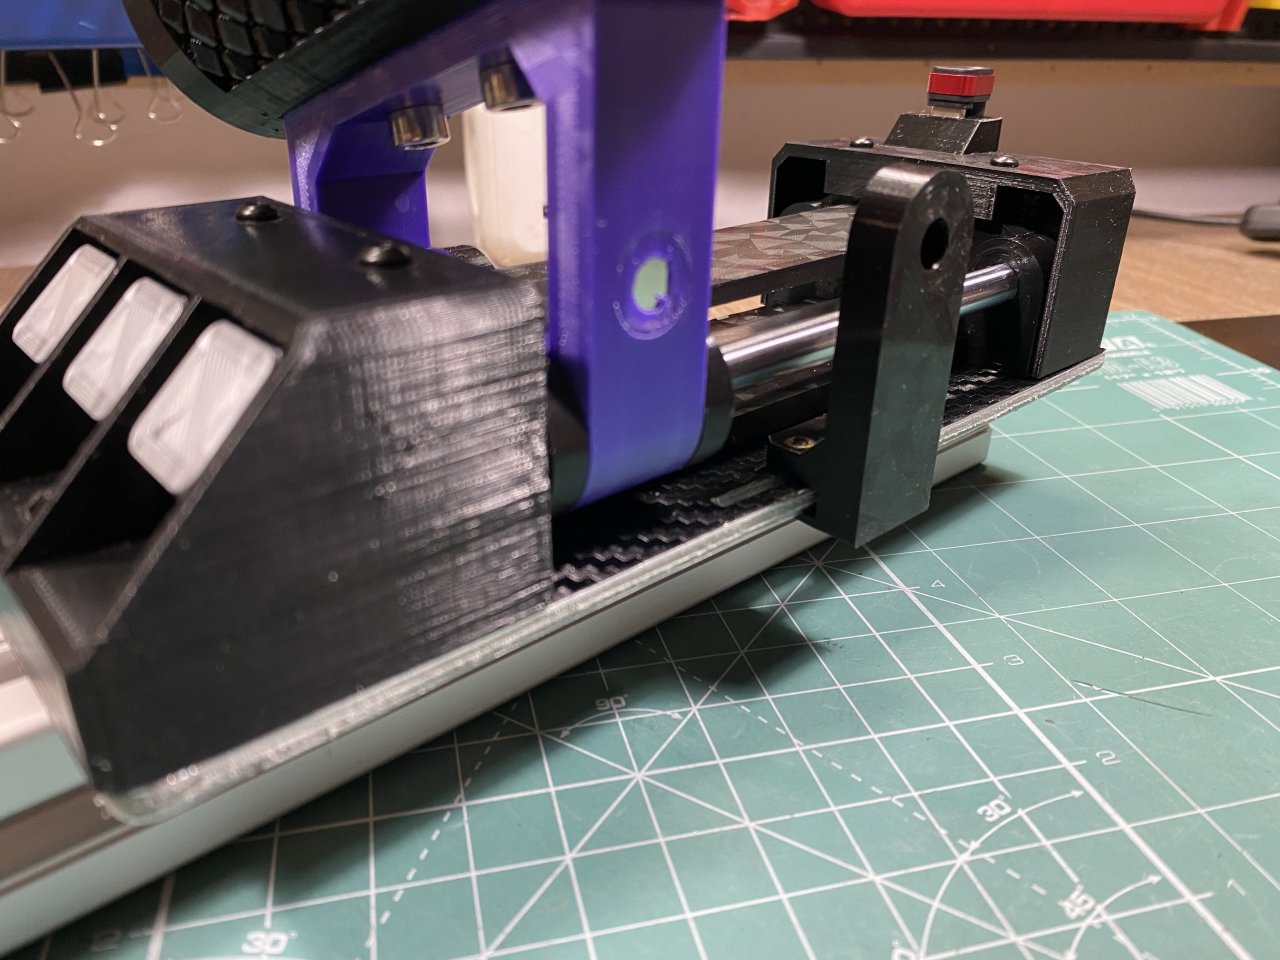
2. Plastic linear bearings RJ4JP x2: https://www.aliexpress.com/item/4001067067056.html
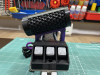
3. Keyboard mechanincal switches x3 - I used some that I already had, you can use whatever you prefer
4. 3D Printer guide rod 8mm - 2x142mm (order something longer and cut to size): https://www.aliexpress.com/item/32332798910.html
5. M3 brass inserts, M3 mounting hardware for housings and rail holders
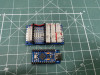
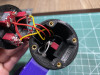
6. Arduino Pro Micro
7. M3 alu washers for the throttle cap for better look
8. M6 mounting hardware for 3030/4040 T-Slot profiles
9. 6mm Mini Momentary Automatic Return Push Button: https://www.aliexpress.com/item/1005003692635582.html
10. Metal guide pin for rocker M3x20mm: https://www.aliexpress.com/item/4000473863693.html
11. USB Cable 180Degree for better look: https://www.aliexpress.com/item/1005003201733100.html
12. Magnets for detent - I used 15x4mm, x2 - work quite well no need to add extra magnets
Instructions:
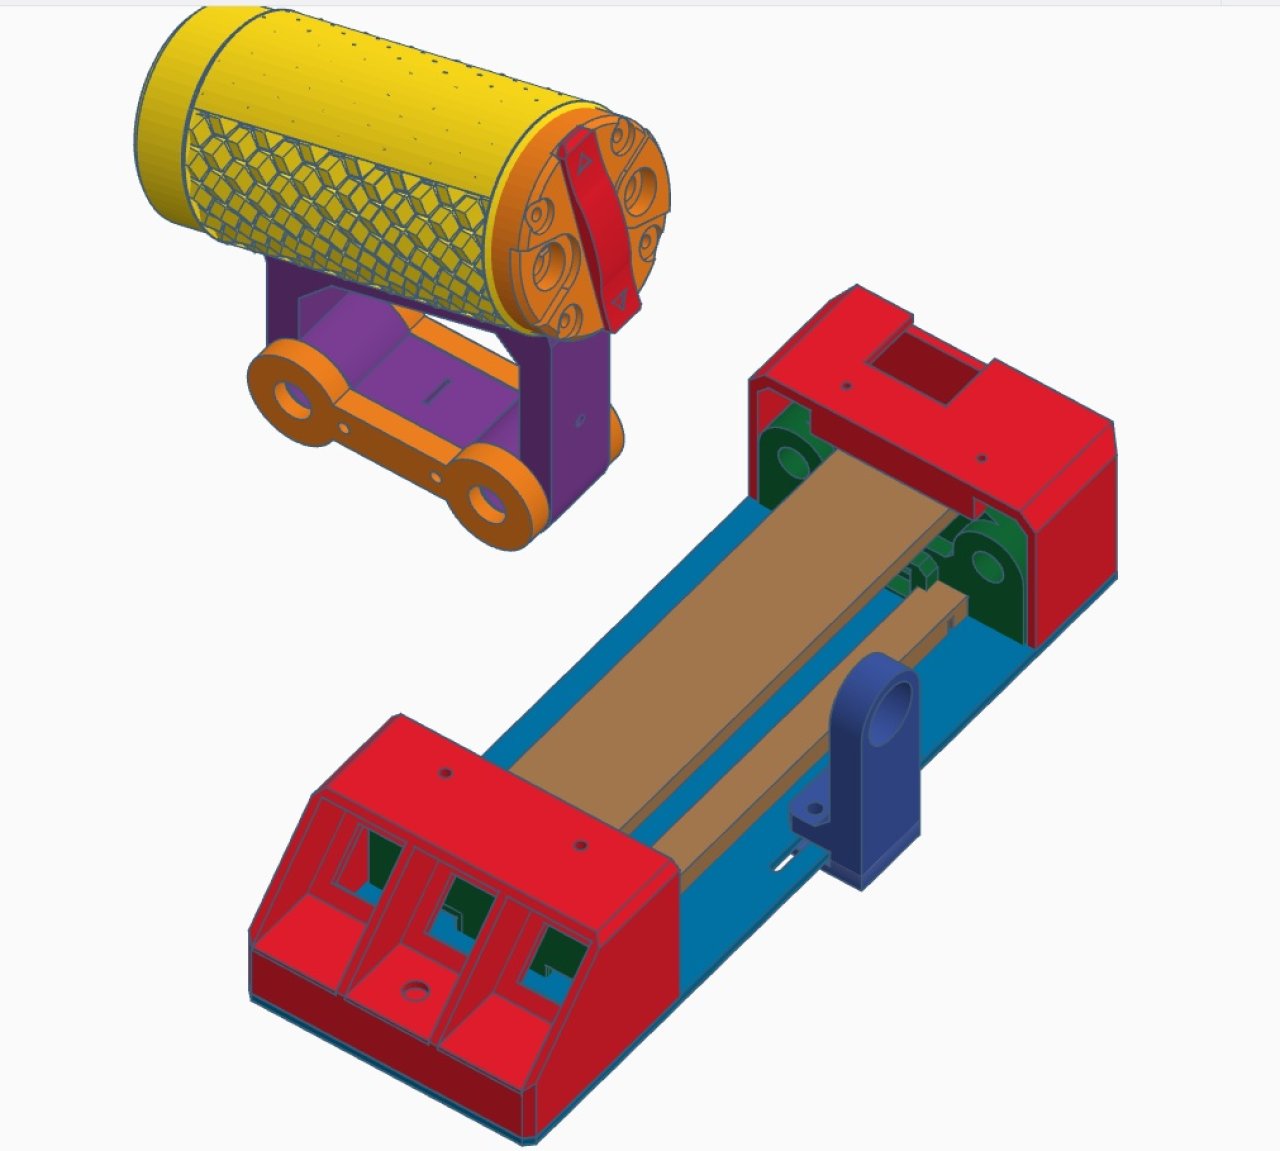
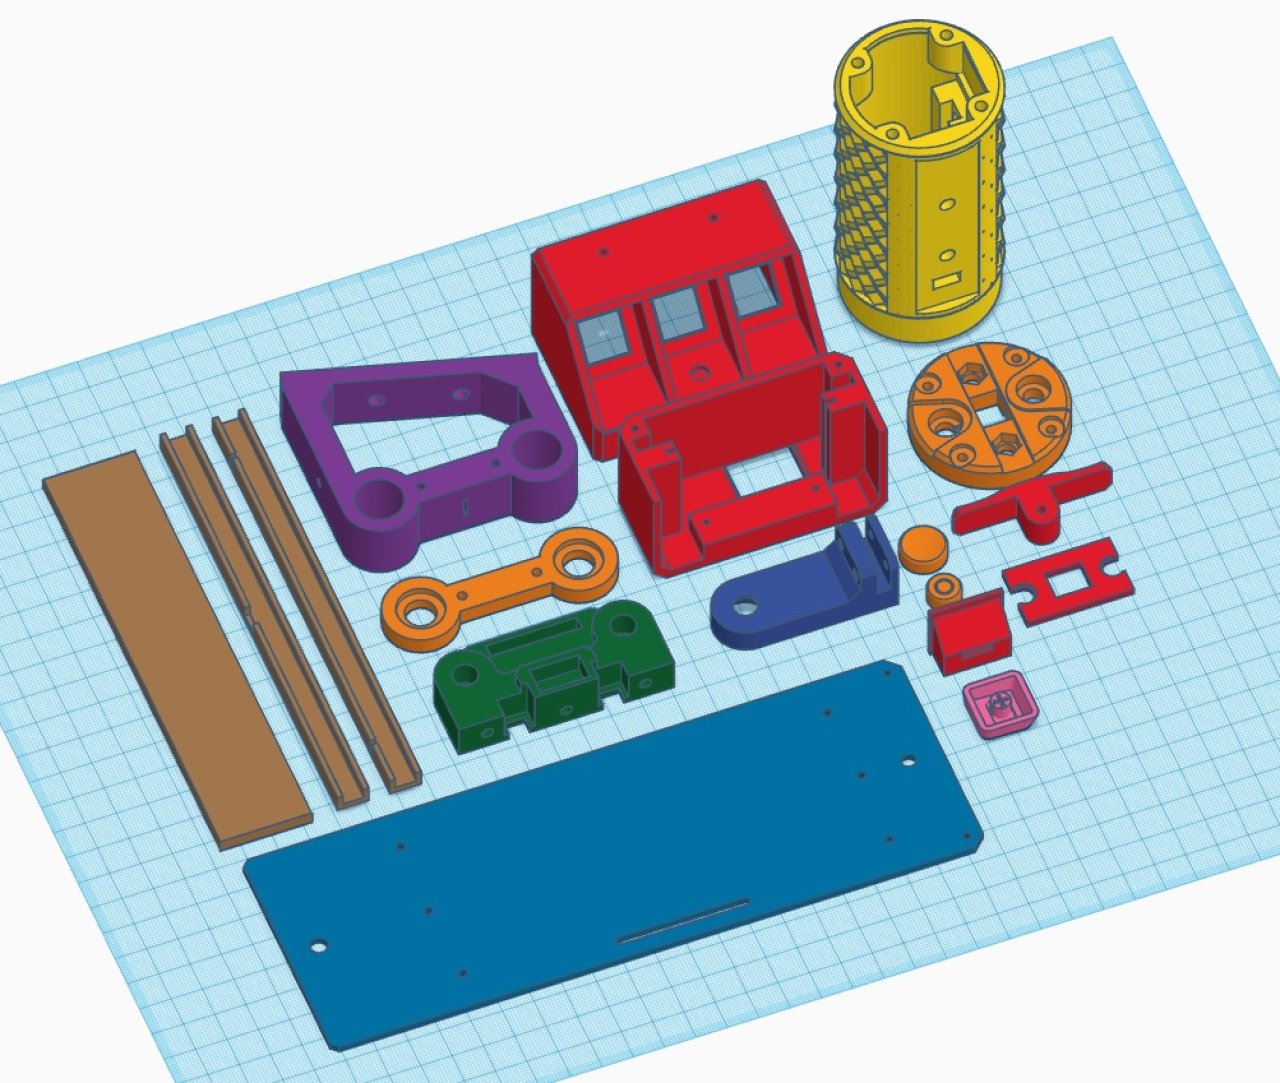
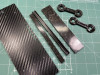
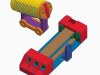
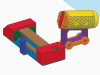
Baseplate - this is more of a template, you need something solid for the throttle base. I cut it from Etalbond, 5mm thickness.
Rails - mount first potentiometer and measure correct placing! I used 142mm rails as this was the spacing for my pot, more or less it should work for you too.
Rail guides - they have small holes so you can add small screws if needed to remove any play in rails.
Potentiometer - I added some self adhesive foam rubber on side to remove the play I had (baseplate was cut by hand so was not very accurate).
Linear bearings - RJ4JP or LM8UU - I have not tested with steel bearings. With plastic it has some resistance, so throttle needs to be solid mounted. When playing actually I like the resistance a lot so will stick with them for now. Steel linear bearings would be LM8UU. Size is 15mm OD, 8mm internal, length - 25mm
Keyboard mechanical switches - these you can tailor according your taste, I already ordered some tactile ones with stronger force and sound for better feedback
Guide pin - as I did not have metal one I cut from wooden skewer the correct length - works well, no issues there.
Keycaps - I remixed a thin profile ones from Thingiverse, as they did not fit my switches. You can use whatever you prefer here. Included what I used in the file, here is the original: https://www.thingiverse.com/thing:4571242
Print settings:
My printer could print most of the parts without supports. I needed only for the front cover/switch mount. It is complex part, but I opted to make to single part for simplicity. Do not remember if I used supports for the grip top cap. Detent magnet holder also needs support. Everything else should be easily printable without supports.
Slider arm has internal guide for cables coming from grip - this is easily printable without supports.
As always everything was printed with 5 layers top/down, 5 walls and 60% infill for better feel and rigidity.
Comments (0)